Lets go through step by step for creating servlet in Eclipse IDE.
1)Creating Project
First of all create a dynamic web project in Eclipse, I am naming it ‘ServletTest’.


After above steps your application will look like below:-

2)Creating Servlet
Now create a servlet inside src folder as shown in below:-


Now you will be see here the code full of errors.So are here require to add proper .jar file.For this just go to ‘Java Build Path’ add add required jar file as below:-


Now you can see that all errors are already resolve after getting proper references as in below screens:-
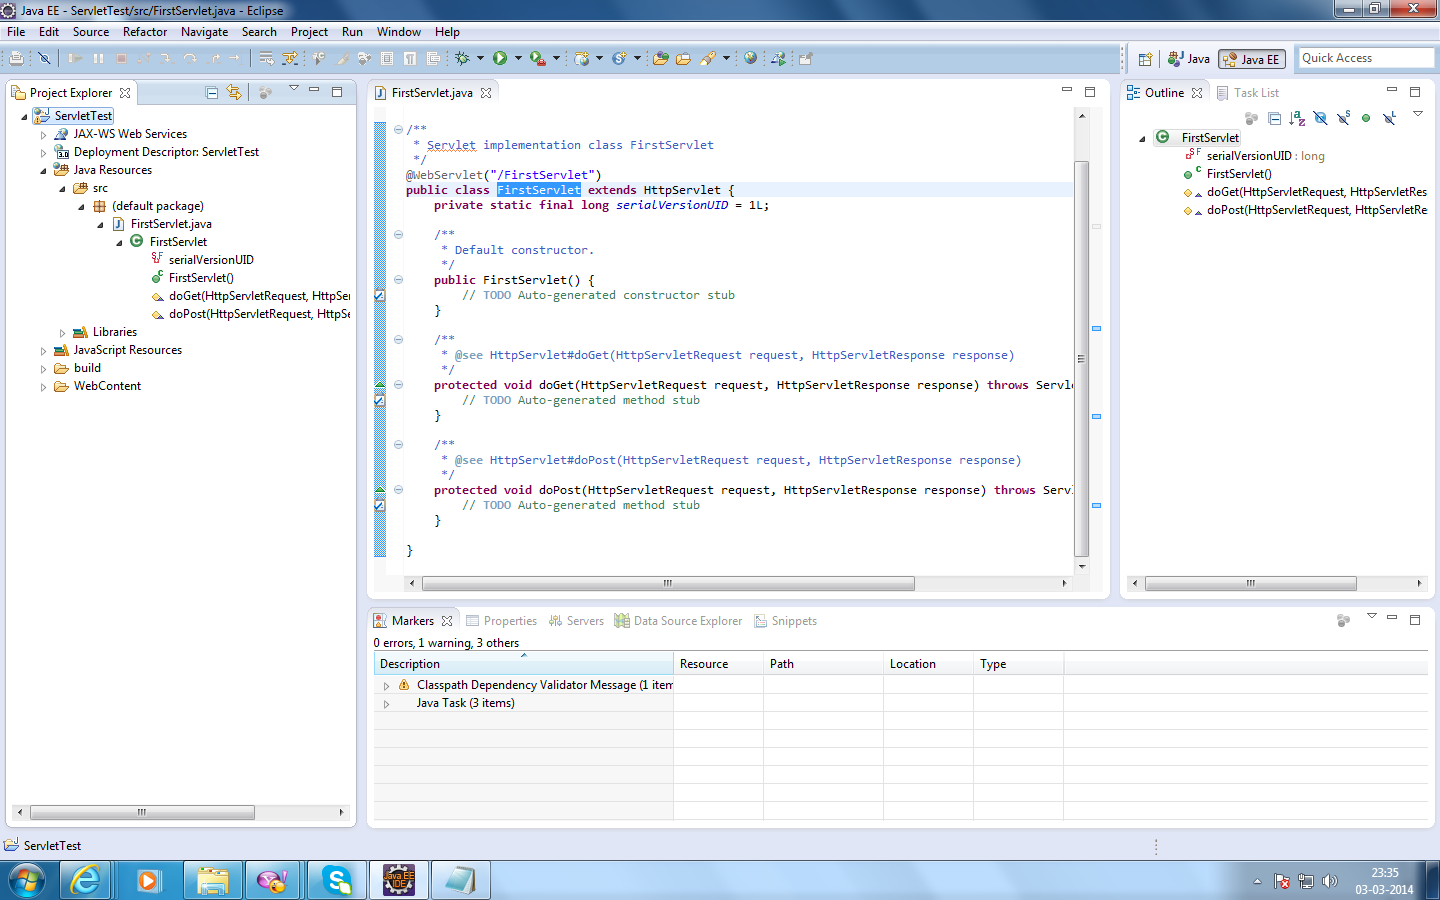
Now I have just modified doGet() method and added some small piece of code there as you can see in image below:-

Now just build your application,things are ready to test on server.
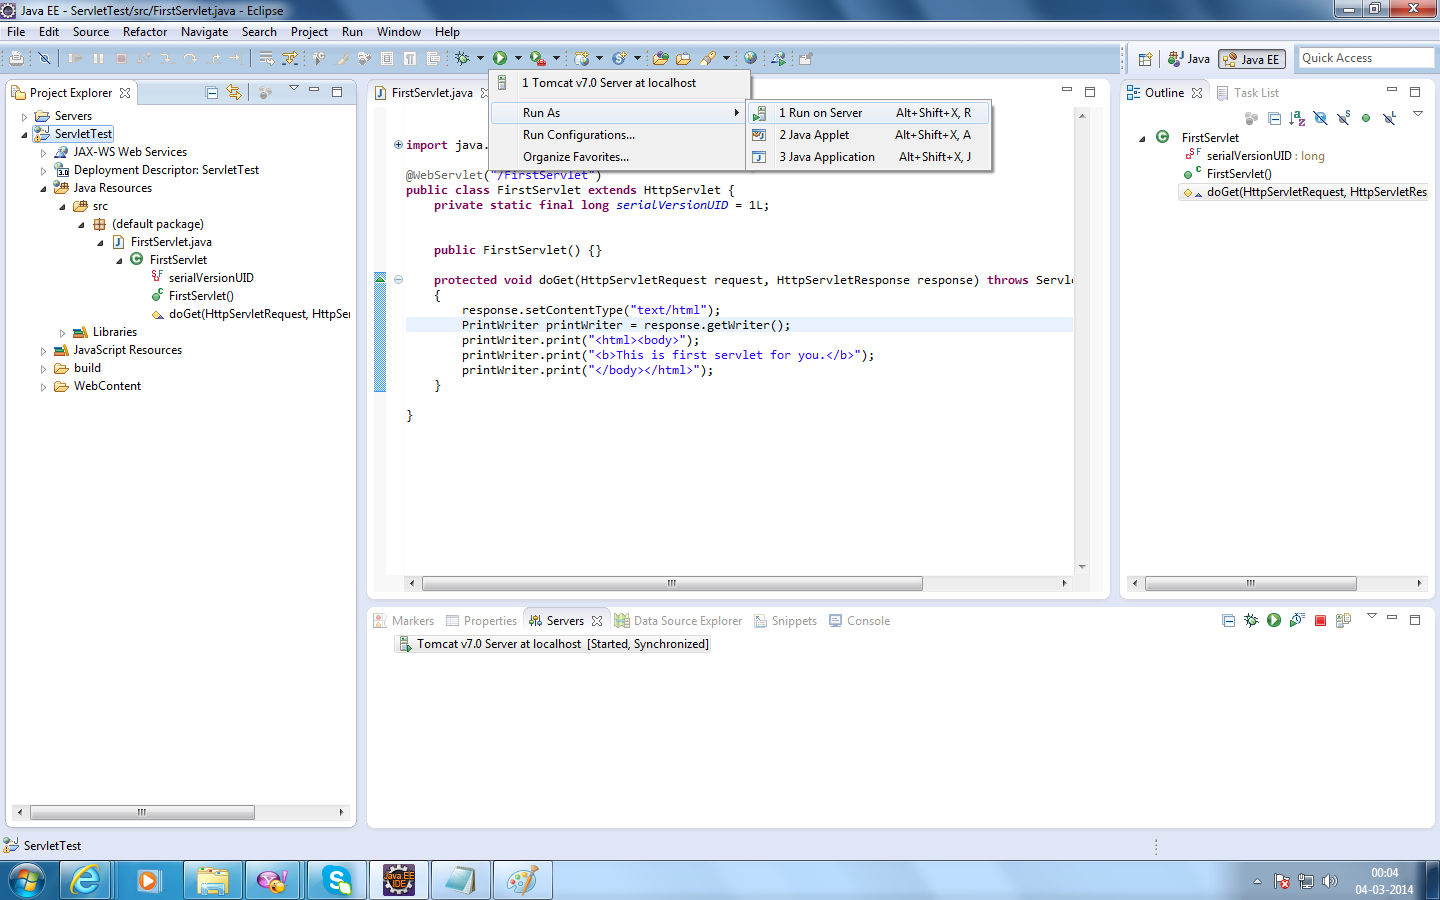
3)Testing on Server
Just try like below:-


Thats all,we have succssfully created and tested our first servlet.
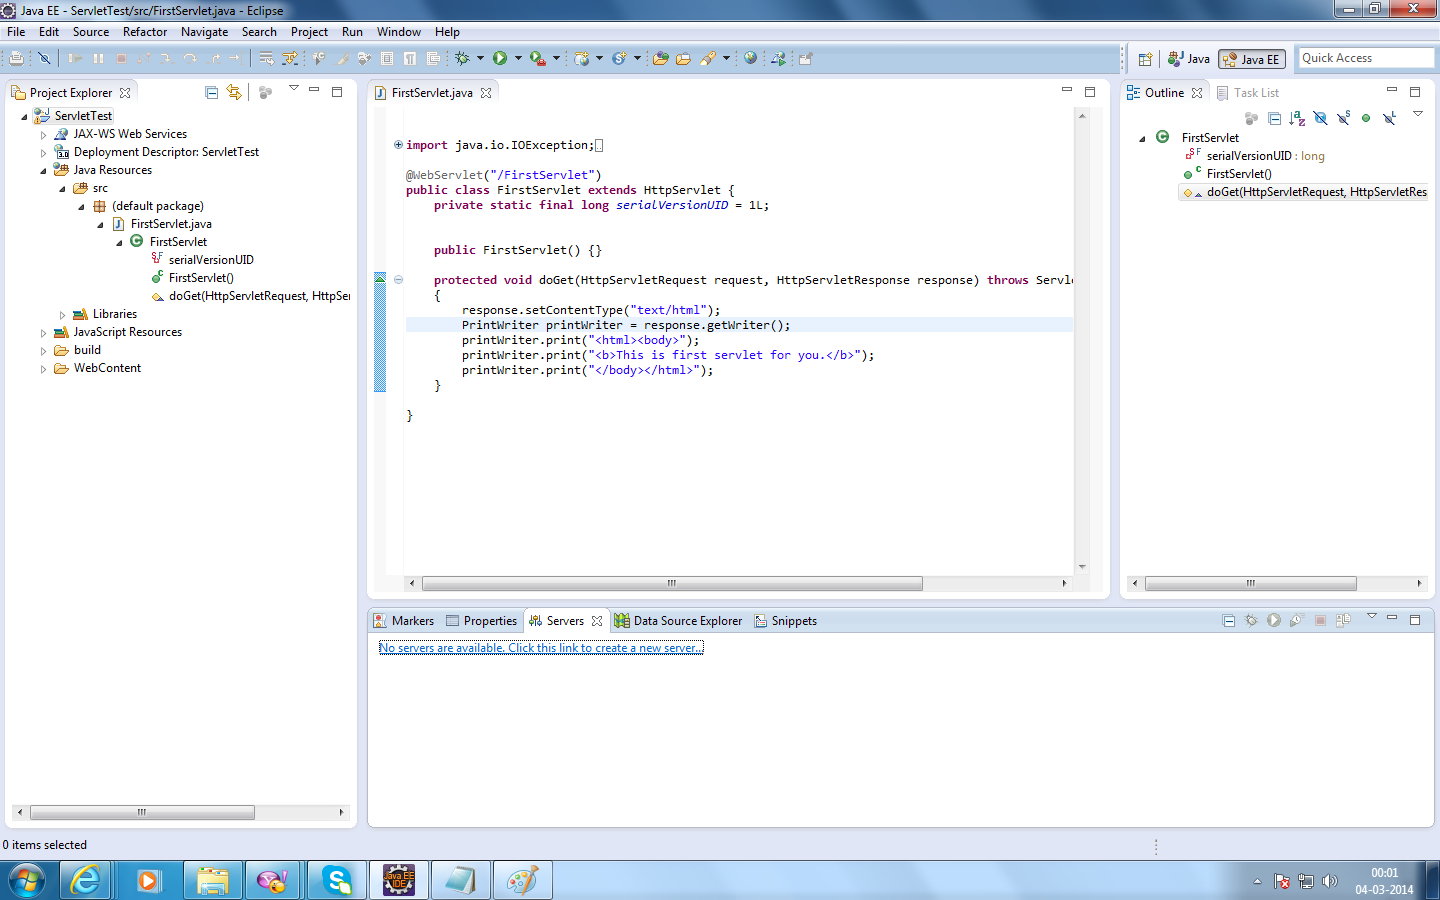
But if you will not able testing thing on server,and you see something like below image:-

The reason for this may be possible that you have not setup server earlier ever.
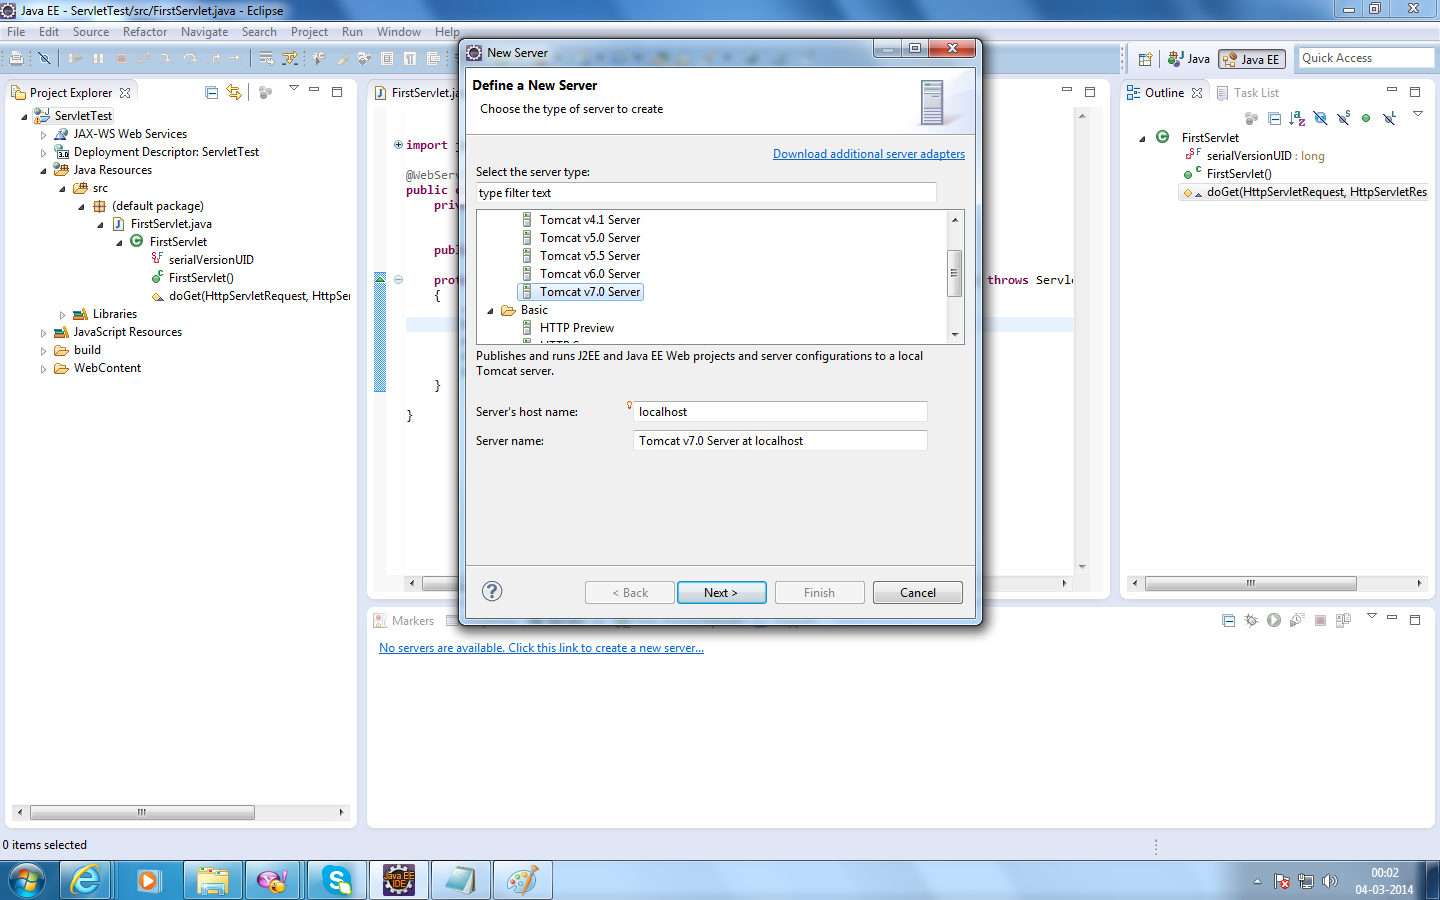
To over come this you will require to setup your server first.As you can see in below images:-


Now as you have setup your server successfully you can now thy steps under ‘Testing on Server’.Hope you have now successfully tested your servlet.
Keep coding…….
